
Before attempting to install your brand-new outdoor kegerator, it is imperative that it be correctly assembled. Many kegerators ship as “some assembly required,” so follow all manufacturer’s instructions regarding such assembly.
If you are unsure about how the kegerator has been assembled, do not proceed with the installation.
For those who are confident about the assembly of their kegerator, here are the steps you’ll want to follow to ensure a proper installation.
#1. Remove the plug. You’ll want to open the door and then push through the top cabinet plug with your hand so it pops out. Stubborn ones can be removed with a small prying tool, like a screwdriver.
#2. Install your tower. Get the beer line hose out of the tower and feed it through the cabinet. Then secure the tower based on the manufacturer’s instructions. There should be no wobble or movement whatsoever. Your faucet connection must face the front of the cabinet. If it does not, remove the tower and reinstall.
#3. Attach your railing. If your kegerator requires a railing around the tower, then install it per the included instructions now.
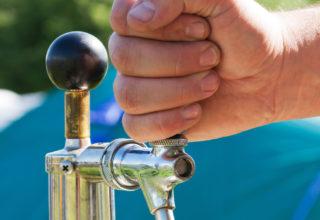
#4. Place your handle faucet. Screw the faucet onto the adaptor that should be on the front of your tower. The faucet must be vertical and have the handle facing the ceiling. Place your drip tray underneath it. Then you can connect your tube to the CO2 regulator.
#5. Connect the regulator to the cylinder. With the cylinder closed and full, you can attach your CO2 regulator to the cylinder by screwing in the loose regulator nut. Many of them are gold. You will need a wrench for this job. Then mount the cylinder to the kegerator as instructed so that you can read the gauge.
#6. Connect the keg coupler. Now you’re ready to begin connecting the keg to the kegerator. Make sure the pull handle of the keg coupler is in the closed position. Then insert it into the locking neck of the keg. You will need to turn it clockwise once inserted about 30 degrees so it will lock into place.
#7. Connect your lines. Once the coupler is locked, you can attach the tubes and lines to the keg. Make sure you connect the CO2 line before connecting the beer line unless otherwise instructed. Once your connections are secure, you can tap the keg. Then calibrate your regulator based on the instructions provided with your kegerator.
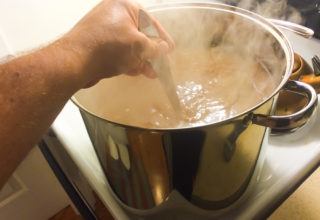
#8. Place the keg in the kegerator. Once you’ve reached this step, you’re ready to position the keg within the interior of the cabinet. Take it slow and slide the keg it to reduce the risk of altering the interior environment of the keg, which would alter the flavor and body of the beer it contains. Before calling it a day, make sure all your lines are clear from any obstruction.
With a great kegerator, you can have fresh beer on-demand, straight from the tap. That may be the best way to crack open a cold one when you’re thirsty.